
3 Tips To Level Up Any Training Program

Any monkey can follow a training program exactly how it is written on paper. Whether you’re following an online template or custom writing your own programs, the difference between seeing good and great results from that program is how you do it, and how well it matches with your goals. In this article I’ll go over 3 tips that you can put to use right away - no matter what your level - to help you see more consistent long term results from your effort.TIP #1: Have a Reason Behind Each Movement
Whether you’re constructing your next program, or you’re slotting accessory exercises into an online template, I’m a huge believer that everyone at every level should have a reason behind every movement in their training plan.Reasons for choosing a certain movement can be as simple or complex as you want. Some example reasons could be:
“Movement X” helps me work on something I’ve identified as a problem in my performance.

Ex: Someone who struggles with hamstring injuries due to weak hamstrings choosing a hamstring curl.
“Movement X” accesses multiple things I need to work on at once. Ex: Using an overhead tricep extension to build triceps and to improve your ability to stabilize weight overhead.I just like “Movement X” Ex: I just like training jumps, they're fun.There’s lots of good research showing “Movement X” to be a good choice for my problems. Ex: Choosing knee isometrics for someone with certain patellar tendon issues.
Your reasons can start as simple as you want - in the beginning it’s better just to have a reason than stress over your reason being supported by all the research in the world. Your reasons for choosing one exercise over another will naturally become better and more supported over time as you continue to learn and gain experience.You can implement this right away by going over your current program, and writing out a quick, one sentence answer to “why?” next to each exercise - why is this in your program? If you can’t come up with a somewhat valid one sentence answer as to why that movement is in there, that exercise might need some more thought.
An example workout with “why’s”.
For example: “Barbell bench press - why?”. This could lead to questions like “Would my goals be better served with a dumbbell bench press? A floor press? An Overhead Press?”. It might lead to an answer like “My main goal is to get a stronger bench press, and the bench press is definitely the most specific tool to achieve that” or “My main goal is hypertrophy, so maybe I’m better off with a movement that I can feel targeting my pecs more, and can handle more workload on”. In both cases the end result is you thinking a little more about what movements are best serving your goals, and tailoring your program a little more towards that. Nice. TIP #2: Have Consistent Start and End Points
Now that you’ve carefully chosen movements that are a perfect match for you and your goals, each of those movements should have defined start and end points that keep your technique consistent and honest.
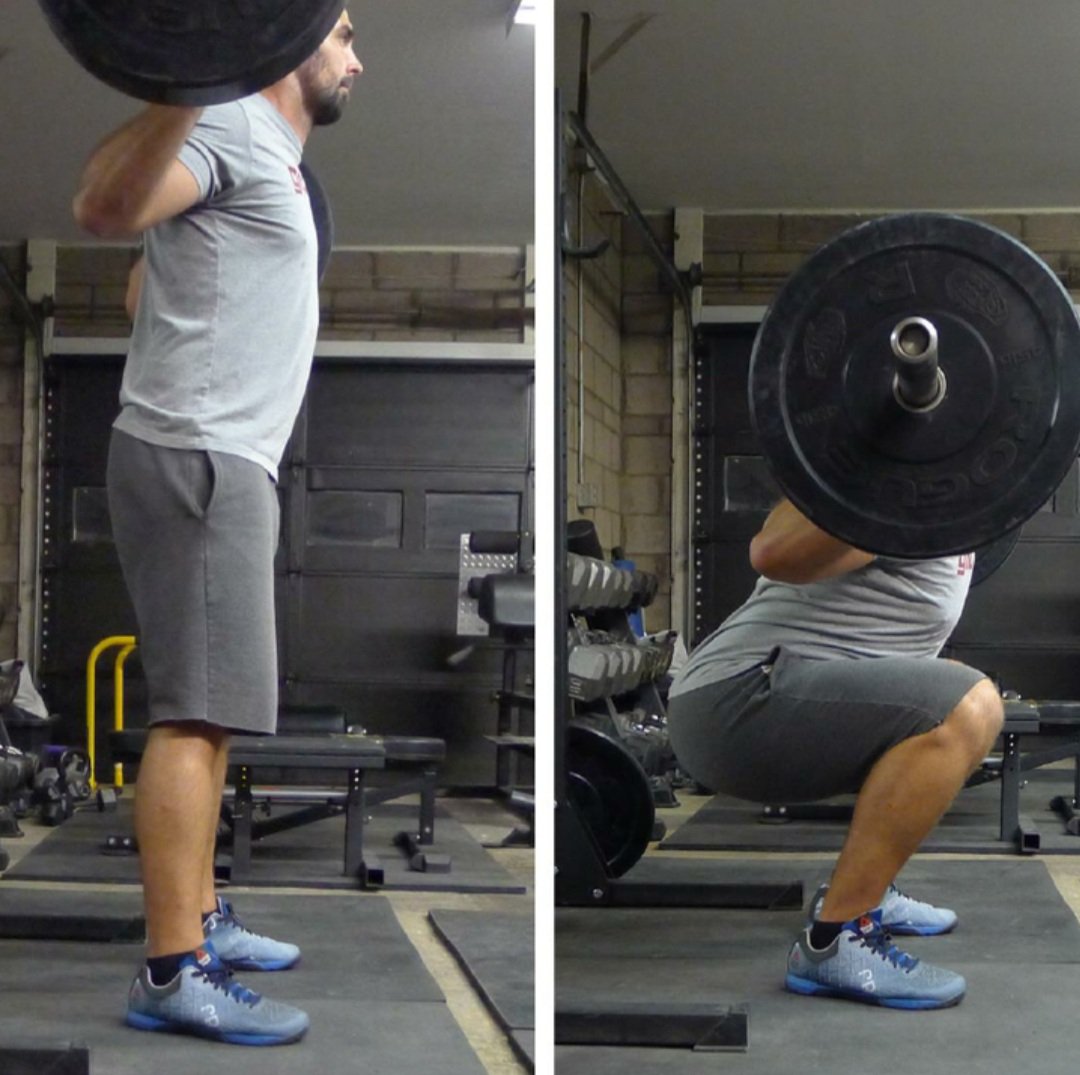
Example of squat start and end points.
The easiest way of picturing why this can be impactful is the powerlifting squat - powerlifting federations define a start and end point on squats performed during a competition so that strength can be easily compared between lifters. In competitions, a squat always starts with the knees and hips straight, and ends once thighs have gone below parallel, then have returned again to the start position. Powerlifters make such a fuss about this because if two lifters perform a squat to the same start and end criteria, and one is able to do it with more weight on the bar - then it’s clear which lifter wins. Easy. If they didn’t define start and end points, we might have lifter A squat 200kg way below parallel and lifter B squat 220kg to just above parallel - who is stronger? Who wins? The only logical way to settle it at that point is for lifters A and B to fight to the death. And then what’s left to separate us from the animals? This same concept can also be applied when comparing the same lifter’s strength at two different periods in time. If before an 8 week program a lifter has a PR squat of 200kg below parallel, and after the program they have a 220kg PR squat to above parallel - did they get stronger? Or did they just make the movement easier? Did this program work for them? Should they design their training differently next time, or is this a good strategy for them? We’ll never know.Now take this concept a little further to apply it not just to main lifts like squats, but to every lift in your program. If you do your pull-ups “chest to bar” one week but only “forehead to bar” the next, not only are you practicing slightly different exercises, but it’ll be hard to tell if you’re making progress. Same thing if your bench touches your chest or not, if your arms are totally straight at the bottom of your curls, or whether your RDL’s get to your shins or your knees. If you expand this out over an entire training program you could see how you could cheat your way into thinking you got stronger in many things, when in reality you haven’t gotten much stronger on anything.Avoid all this by setting movement criteria on where your exercises start and end. Some examples could be:Chin-ups
Start: total dead hang, arms straight.
End: chin over the bar.
Romanian Deadlifts
Start: standing tall, hips and knees straight.
End: with the bar just below the knee.
Split Squats
Start: standing tall.
End: when the back knee gently touches the floor.
You can modify your movement start and end points according to your goals. For example, sprinters often use partial squats - stopping well shy of parallel as their “end point”- to improve specific qualities of their sport. The important thing is that criteria stay consistent across the entire duration of a training program.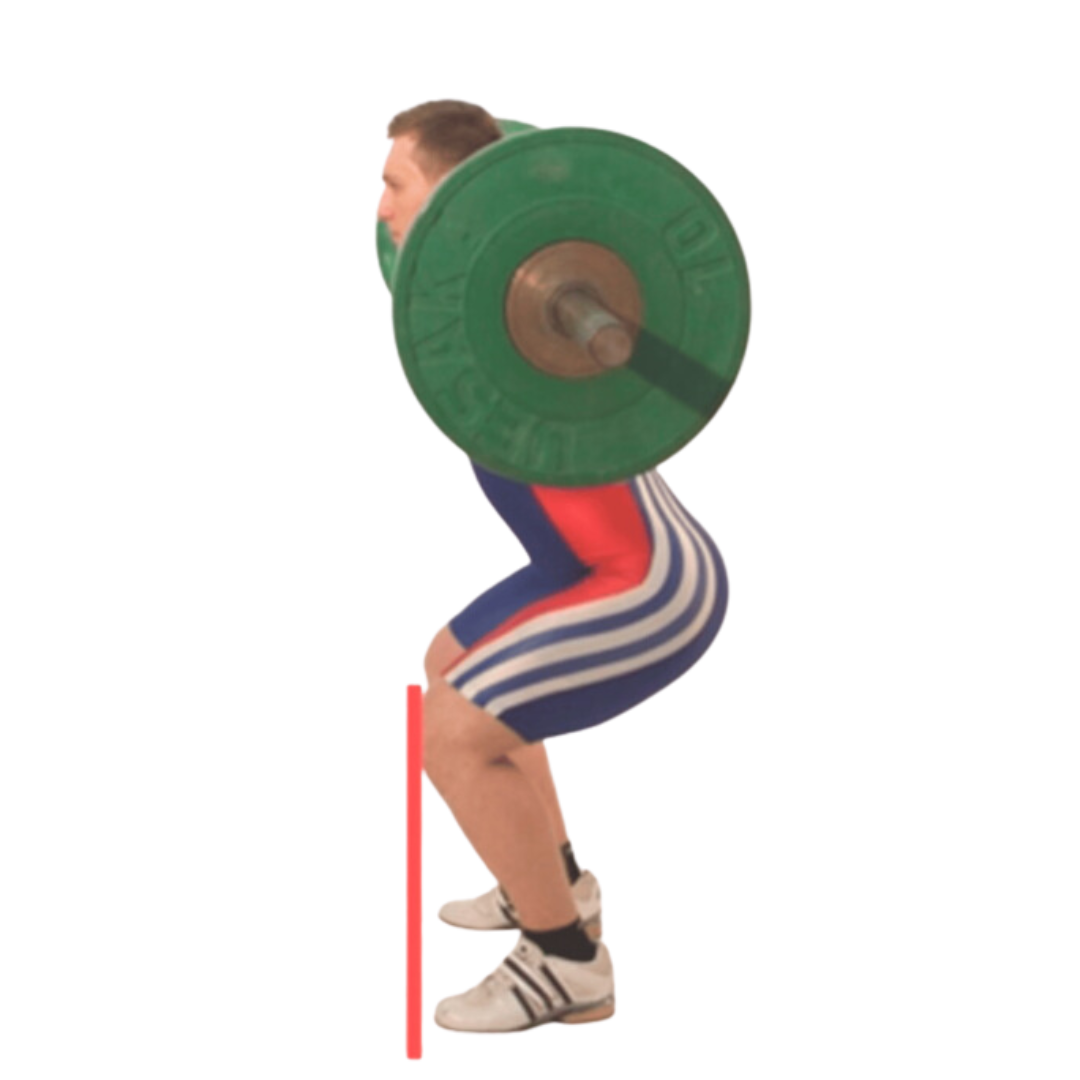
An example final depth or “end point” for a partial squat.
Once you’ve picked your start and end points, you should be aiming to stick to them as strictly as possible for your whole program. That will sometimes mean if you can’t get a rep all the way through the start and end points, that you don’t count that rep. For exercises that can be tempting to cheat on like chin-ups, rows, or shoulder presses I’ve found it helpful to write the start and end points next to the exercise name in my program as a reminder. Taking a video of your technique every now and again can also be a good way to hold yourself accountable. That way there’s no excuse for being a no good dirty rotten stinky cheater.#3 Have A Way of Evaluating Your Progress
So you’ve selected great movements and you’re performing them with impeccably consistent technique - but how do you know if it’s all making you better? Everyone should have a way of consistently evaluating their progress on the thing they are trying to improve.


Let’s say you just finished up a program you designed with the goal of increasing your vertical jump. The only way you’re going to know if the strategy in the program was effective or not is to test your vertical jump once the program is completed, and compare it to your vertical jump pre-program. If your jump goes up it likely means this training strategy is a good one for you. If your jump doesn’t go up, or only goes up a hair, there might be something you could be doing differently for the next program. Either way evaluating your jump gives you valuable information on how to keep getting better.


If you don’t ever bother to test your vertical jump, you could easily roll through the program without putting a millimetre on your vertical and think you’re making decent progress, or you could actually be putting decent height on your vertical jump but not be able to see the change, leading to you changing a strategy that is actually great for you.


The concept seems obvious to most people with the vertical jump example - but the same idea often doesn’t get applied to other training contexts. It’s hard to improve something you’re not consistently measuring, so whether you’re training to gain muscle, get stronger, increase power, or increase endurance you should be evaluating progress to see if your approach is working or if it could be improved. Here are some ways to test your progress on common adaptations, and some things to keep in mind while doing so.
How to Measure Hypertrophy:
The ideal measure for this is a DEXA scan or hydrostatic weighing - but I’ll only be doing that if you’re paying. 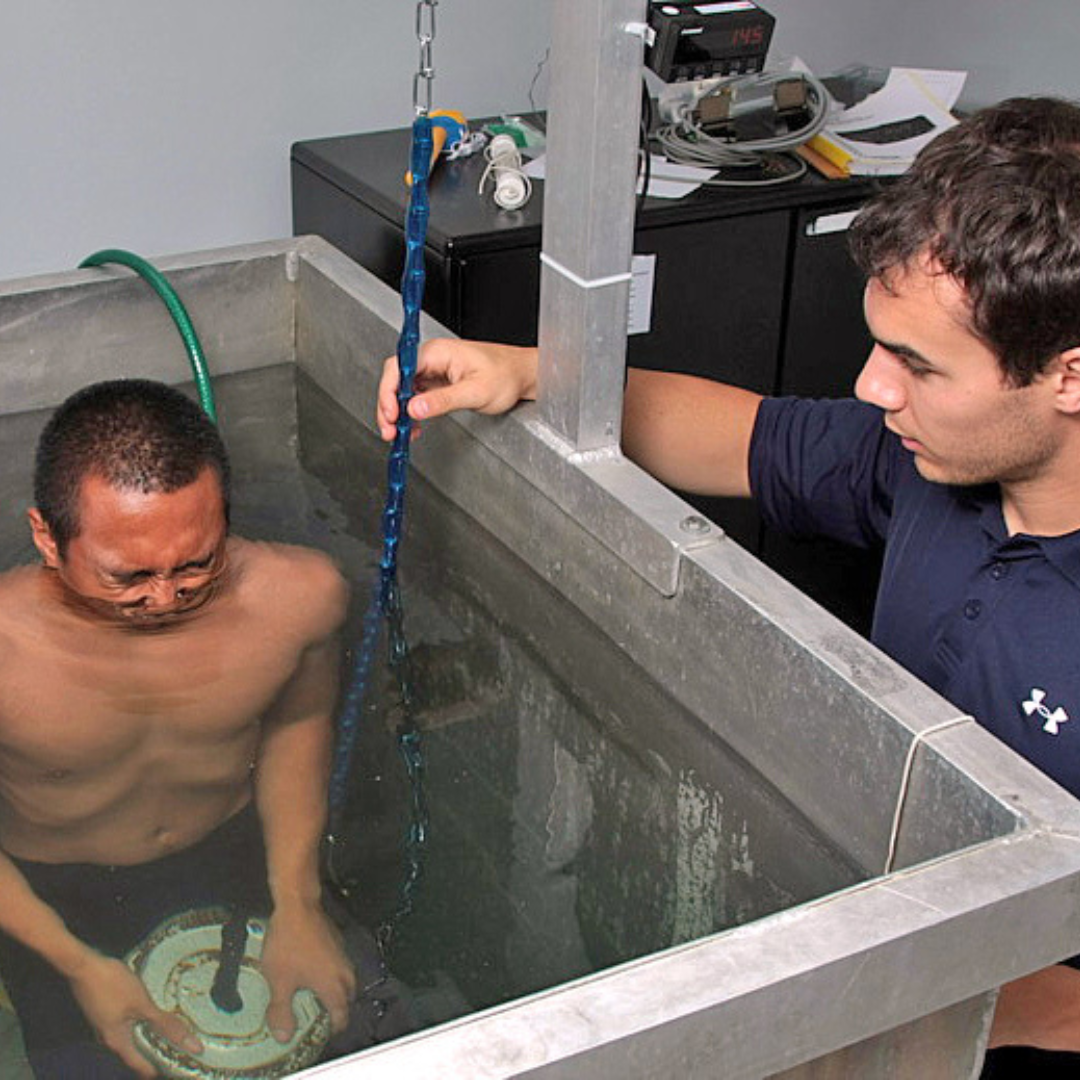
Hydrostatic weighing - looks both fun and expensive.
For most people the best way to measure hypertrophy is to build a picture from consistently monitoring bodyweight, weights in the gym, and progress photos.
Bodyweight
Taken before consuming any food or drinks and post-bathroom first thing in the morning.If you’re bodyweight is going up consistently over the course of your program, you’re at least adding some sort of new tissue.
Getting stronger, and handling more work in the gym
If you are able to handle more volume (sets/reps) and you are getting stronger in the gym, it is a very good sign that the tissue being added is at least partially muscle tissue.
Progress pictures
Taken in the same place, same time of day, same lighting, same camera, same angle. And no pump - that’s cheating.In comparing many of these photos over time it'll give you further visual clues if the tissue you are adding is muscle or not.
How to Measure Strength:
The easiest way to measure strength is to test your 1 rep max across the major lifts and compare many tests across time. The trick is that depending on where you are in a program or a competitive season, blasting out a 1RM could generate a lot of fatigue at a time you don’t want it, messing up the progression of your program or harming your performance in competition.To avoid this you can use less disruptive ways to find your 1 rep max like calculating it based off hard sets that already would have happened as a part of your normal training. It’s generally a good idea to use the calculations with sets under ~5 reps, and closer to failure for accuracy's sake. Here’s a 1RM calculator that takes RPE (rate of perceived exertion) into account. Another less disruptive option is using planned AMRAP (as many reps as possible) sets with a capped RPE (ex: AMRAP until you reach RPE 8). If you get more reps at the same RPE as the last time you did the same protocol, it’s a good sign your approach is making you stronger.How to Measure Power:
It would be ideal if you had a force plate - but yeah, nobody does. 
Force plates are very cool, but not widely accessible.
Some more practical measures of power are vertical jump height, broad jump distance, or med ball throw distance - depending on what kind of power your program aims to develop. Unlike 1RM testing, these tests don't cause a lot of fatigue, so there’s usually no harm in doing them frequently. The only trick is, expression of power is very heavily affected by levels of fatigue - so if you’re testing your jump during a week where there’s lots of stressful training going on, your jump performance will be masked by fatigue (even if “underneath” the fatigue your vertical jump has skyrocketed). For this reason you might be best doing your power tests after you've finished a program and had some time to recover and get rid of fatigue, or looking at the movement of weekly average results of your power tests instead of relying on any single result by itself.How to Measure Endurance:
You’d ideally go in somewhere and get a VO2max test but once again, likely not. A yo-yo test, or 1.5 mile run test with an accompanying calculation are more practical ways of estimating aerobic endurance, and might be the next best thing. Similar to 1RM tests they come with considerable fatigue, so it’s best to build them into your program with some days to recover afterwards.
A more practical way to evaluate if you are gaining endurance for most people is to simply look at your weekly average endurance training volume - if you are on average handling more distance, or the same distances at a faster pace week-to-week and program-to-program, you’re likely improving endurance. Picking a test that is convenient that you can be consistent with is the most important thing until you get to a higher level where precision becomes more important to detect smaller changes.
To sum it all up, if you just follow what’s written on the spreadsheet it’ll get you results, but taking the time to look at how you're performing things, and how it all fits together will often uncover some spots that can get you even longer term results for very little extra effort. Being invested in the process, and making an effort to be a student of your training will always yield more sweet, sweet gainz. So make sure you have a reason for your movements, you’re adhering to start and end points for those movements, and you’re assessing what kind of progress you’re making every now and again - because it all just might make you a little better. Helping people find ways to more efficiently use their effort to get better is one of the things I love about being a coach. If you feel like you’re stuck in your training, or you could be progressing more efficiently, you can book a free video meeting with me here - I guarantee you’ll leave the meeting with a clearer direction towards your goals than when you came in.